Dolphin
Setup Guide
Step 1: Get the Dolphin sources
Dolphin currently needs to be built from the source files available for download on https://gitlab.com/h-reality/dolphin. Download or clone the contents of the master branch to the desired location on your machine.
(to clone with https: https://gitlab.com/h-reality/dolphin.git ; to clone with ssh: git@gitlab.com:h-reality/dolphin.git)
Step 2: Ultraleap haptics SDK
Access to the haptics SDK can be requested from Ultraleap over here: https://developer.ultrahaptics.com/downloads/sdk/
Step 3: Set up Qt
Dolphin is built using the Qt framework and MSVC compiler. The MSVC compilers are automatically installed if you have Microsoft Visual Studio installed with all C++ components on your machine, or can be manually obtained from : https://visualstudio.microsoft.com/fr/downloads/#build-tools-for-visual-studio-2019
Download Qt and Qt Creator via the Qt online installer: https://www.qt.io/download-open-source
(If for some reason the previous page’s links appear broken, you can also access the installer directly here: https://www.qt.io/download-qt-installer , however we strongly recommend you take note of the terms of use of Qt for open-source development).
When running the Qt installation manager, select “Add or remove components” and make sure to install Qt 5.x (as of writing, the most up-to-date is 5.15.2) as building the applications will fail if using prior or subsequent versions of Qt.
During the installation, install support for the MSVC compiler you previously installed (add the appropriate MSVC kit to your installation).
Step 4: Open and configure the Dolphin Qt project(s)
Once everything is installed, open the Dolphin project in Qt Creator using File > Open File or Project… and select the appropriate .pro file:
- If you want to build the stimulus design tool: “
./tools/design_tool/src/dolphin_design_tool.pro" - If you want to build the stimulus reader tool: “
./tools/reader/src/dolphin_reader.pro"
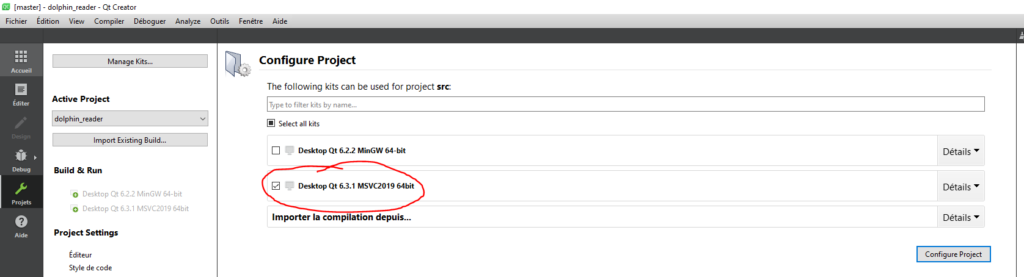
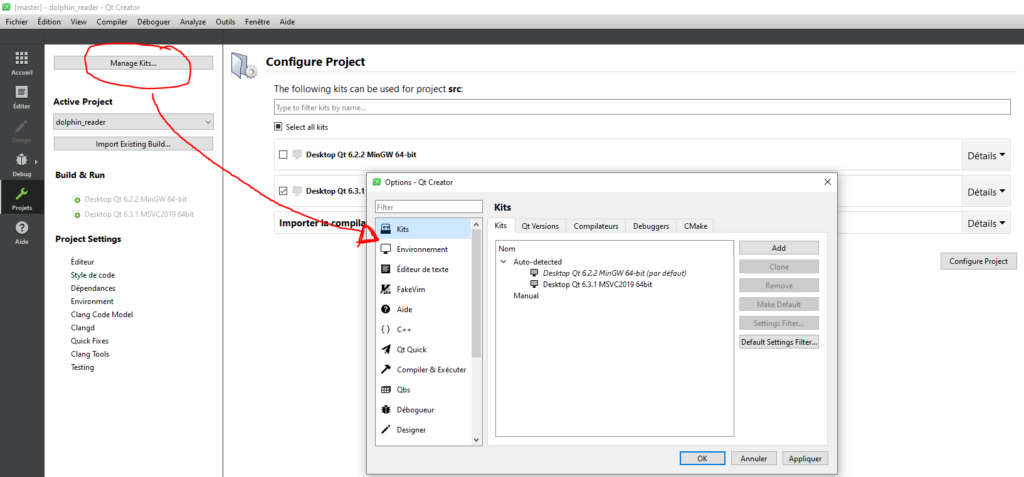
Upon loading the selected project, Qt will display a configuration window allowing you to select the adequate compiler from the list of avaiable kits (Qt lingo for compiler and associated build tools). Select the previously installed MSVC kit if it appears in the list.
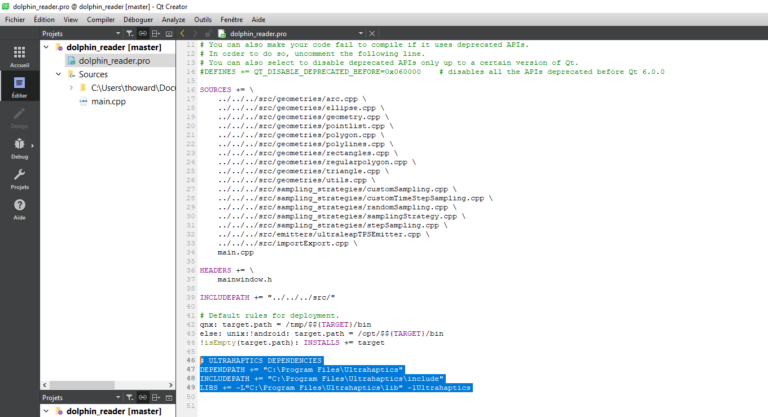
Edit the .pro file to correctly set the path of the Ultrahaptics library to your installation path
(the three lines under #ULTRAHAPTICS DEPENDENCIES).
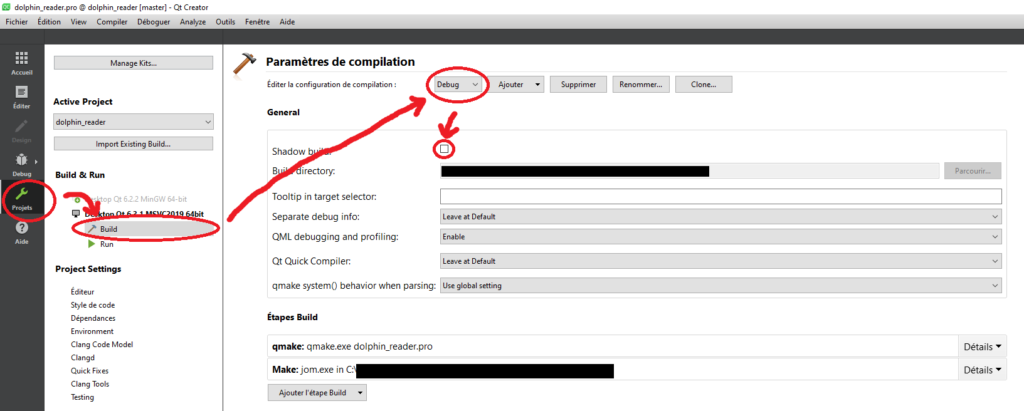
On the left of the Qt Creator window, click Projects and select your MSVC compiler. In the Build Settings section, choose the Debug configuration and uncheck the Shadow build checkbox, then do the same for the Release configuration.
Select whichever build configuration fits your purpose (Debug or Release) and click the Run button (green triangle at the bottom left corner of the Qt Creator Window) to build and run the design tool.
Step 5: Launching the tools from within Qt Creator
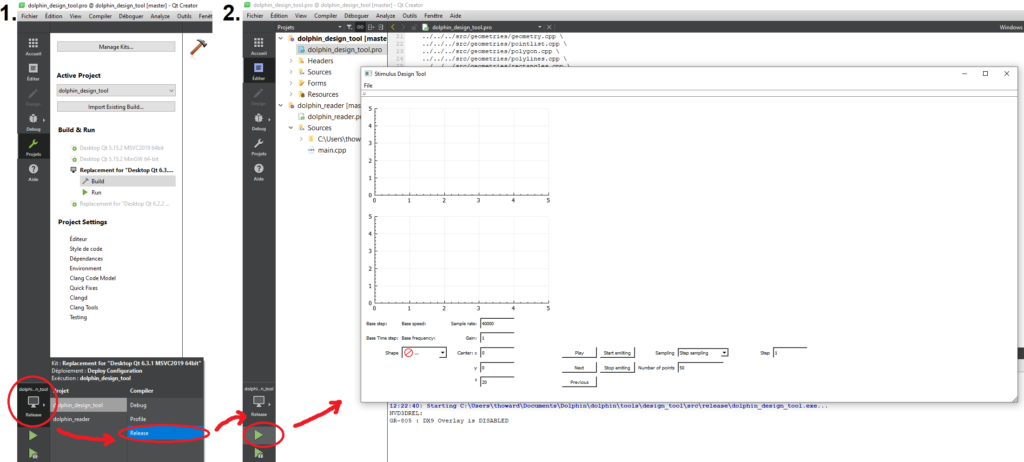
Once the loaded project is correctly configured and loaded, you should be able to directly build and run the tool from within Qt Creator by clicking the “Build & Run” button (green triangle at the bottom left corner of the Qt Creator Window).
Beforehand, select whichever build configuration fits your purpose (Debug or Release) by clicking the computer icon above the “Build & Run” button.
The selected tool can then be used normally (see Designing Stimuli for a tutorial on the stimulus designer tool, and Sensation Playback for a tutorial on the reader tool).
Dealing with common build issues
If you encounter any other build issues which you cannot easily resolve, do not hesitate to get in touch (see contact e-mails on the gitlab page).
Step 6: Building and independently launching the executables
Unless you configured it otherwise in the Qt Creator project settings, building or building and running one of the projects will generate a folder containing an executable file for the given tool which can be run independently from Qt Creator. Some additional steps are however necessary to ensure the required software libraries are correctly found by the tools.
By default, the path to the folder with the executables will be:
- “
./tools/design_tool/src/release" or "./tools/design_tool/src/debug" for the stimulus design tool, depending on whether you built it in Release or Debug configuration. - “
./tools/reader/src/release" or "./tools/reader/src/debug" for the reader tool, depending on whether you built it in Release or Debug configuration.
To launch the executable contained in any of these folders, start by copying the Ultrahaptics DLLs (Ultrahaptics.dll and libusb.dll) which are found in the “./Ultrahaptics/bin” folder of your Ultrahaptics SDK installation. Paste these in the folder with the Dolphin tool executable.
Then, copy the required Qt DLLs (QT5Core.dll, QT5Gui.dll and QT5Widgets.dll if built in “Release” configuration, QT5Cored.dll, QT5Guid.dll, QT5PrintSupportd and QT5Widgetsd.dll if built in “Debug” configuration) from your Qt installation folder (e.g. “C:\Qt\5.15.2\msvc2019_64\bin“). Also paste these into the folder with the Dolphin tool executable.
Finally, copy the “platforms” folder from the “plugins” folder of your Qt installation (e.g. “C:\Qt\5.15.2\msvc2019_64\plugins“) to the folder with the Dolphin tool executable.
Once all these elements are placed in the folder with the tool’s executable file, you should be able to launch the executable directly without running Qt Creator in the background. The folder with the executable then also acts as a self-contained portable installation of the Dolphin tool.
Common execution issues
Below is a (non exhaustive) list of quick fixes for common issues when running the Dolphin tools. If you encounter an issue not listed here, please get in touch to tell us about the issue, your fix for it, or to request assistance (see contact e-mails on the gitlab page, or use the contact form).