This page is meant as an introduction to using Dolphin’s Stimulus Designer tool. It covers the philosophy followed in Dolphin when designing ultrasound mid-air haptic (UMH) stimuli, the general workflow predicated by the Stimulus Designer, as well as the individual functionalities of the tool’s GUI components.
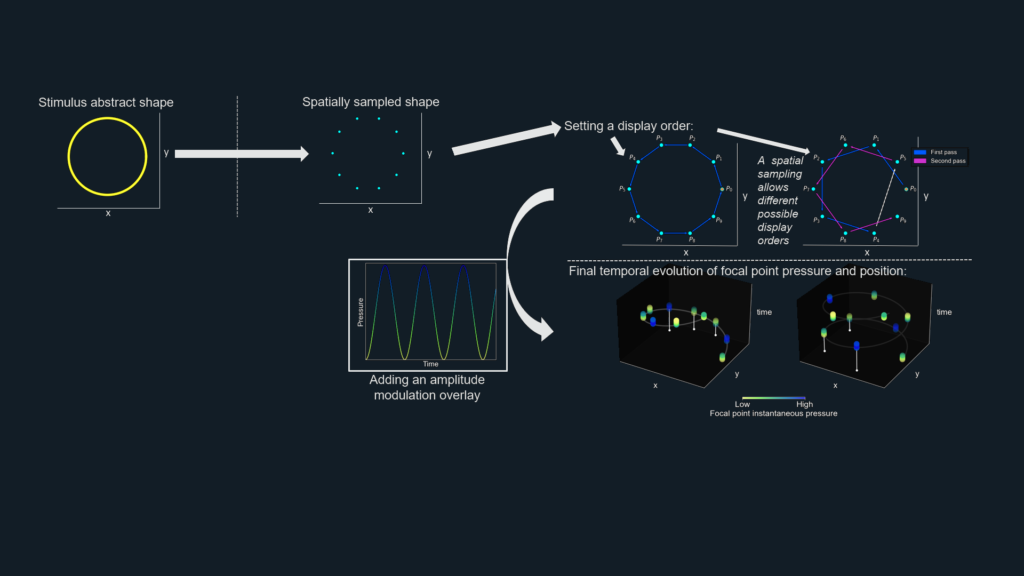
UMH stimuli are the result of a small number of focal points (usually one) whose position and instantaneous peak pressure are varied as a function of time. Dolphin approaches UMH stimulus design as a two-step process beginning with (1) the definition of a stimulus geometry followed by (2) the application of a “sampling strategy” to said geometry.
A sampling strategy ensures the transformation of an abstract (continuous or discrete) geometric shape into a temporal sequence of focal point positions and peak pressures, through three sampling steps. The first sampling step is spatial sampling, which simply consists in discretising the abstract geometry into a finite set of points. The second sampling step is temporal sampling of the obtained set of points, resulting in a temporal sequence of focal point positions (a display order, i.e. position as a function of time). Finally, the final sampling step consists in the overlay of an amplitude modulation (pressure as a function of time) to the obtained display order.
We describe this approach in more detail in our paper :
This approach ensure full control over all physical aspects of the stimulus, with the advantage of operating in a modular fashion, which can be particularly useful when designing and comparing variations of stimuli, or investigating the perceptual implications of specific changes to stimulus properties. For example, following Dolphin’s workflow, any number of different sampling strategies can be applied to a given abstract geometric shape, ensuring that the general spatial properties of the stimulus remain unchanged and the only perceptual effects observed are the result of a variation in the sampling strategy. Similarly, within a sampling strategy, any number of display orders can be applied to a spatially sampled shape, again ensuring that any changes in the perceived stimulus properties are the result of a change in temporal sampling, while the stimulus spatial properties and spatial sampling remain unchanged.
Alternative WorkflowsWhile the workflow chosen for the Stimulus Designer ensures complete control over stimulus properties in a modular fashion, it is not always the most intuitive to follow. We are currently working on enabling alternative workflows for situations where stimulus designers want to focus on specific spatial distributions of properties of the resulting stimulus (e.g. draw frequency as a function of position on the shape). For the time being, the Stimulus Designer provides a graphical overview of resulting stimulus properties but designers still need to either explicitly calculate their desired geometry and sampling strategy parameters or follow a process of trial and error when tweaking the parameters to obtain desired stimulus properties.
Dolphin Stimulus Design Workflow
Lorem ipsum dolor sit amet, consectetur adipiscing elit. Ut elit tellus, luctus nec ullamcorper mattis, pulvinar dapibus leo.
Selection and parameterization of an abstract geometry
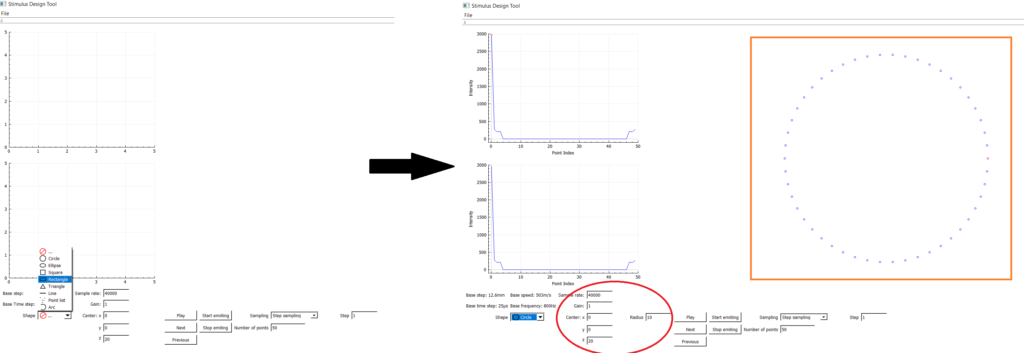
The first step in creating a stimulus lies in the selection of a fitting abstract geometry to define the spatial characteristics of the stimulus (shape, position, extent). Use the drop-down menu in the bottom left corner of the GUI to select an appropriate geometry. Once selected, a preview of the geometry (with default current spatial sampling) will be displayed on the right side of the GUI. Use the geometry parameters (circled in red) to adjust shape spatial properties. When modifying a property, be sure to hit enter to apply the new entry.
Current limitation: only 2D geometries in a plane parallel to the device are supportedBecause the most common current use-case for UMH stimulus design is the display of stimuli with planar geometries under optimal conditions, i.e. when the hand lies parallel to the device plane, the initial focus with Dolphin's Stimulus Designer was on enabling rapid prototyping of 2D stimulus geometries in a single plane parallel to the device (although the plane height can be freely adjusted). We are currently working on extending the Stimulus Designer GUI and geometries library to deal with 3D geometries.
Below is a detailed overview of the available geometries:
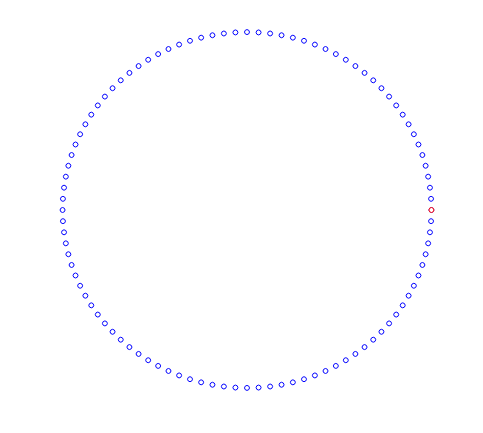
Circle
Lorem ipsum dolor sit amet, consectetur adipiscing elit. Ut elit tellus, luctus nec ullamcorper mattis, pulvinar dapibus leo.
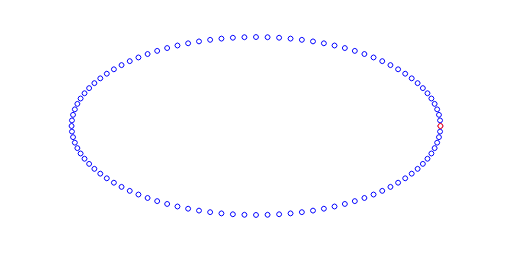
Ellipse
Lorem ipsum dolor sit amet, consectetur adipiscing elit. Ut elit tellus, luctus nec ullamcorper mattis, pulvinar dapibus leo.
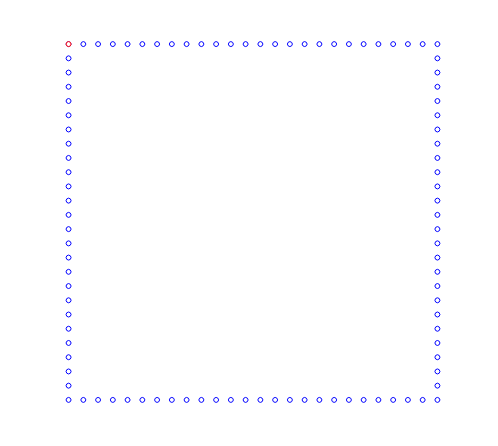
Square
Lorem ipsum dolor sit amet, consectetur adipiscing elit. Ut elit tellus, luctus nec ullamcorper mattis, pulvinar dapibus leo.
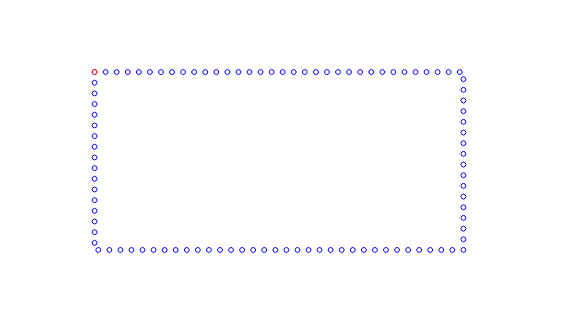
Rectangle
Lorem ipsum dolor sit amet, consectetur adipiscing elit. Ut elit tellus, luctus nec ullamcorper mattis, pulvinar dapibus leo.
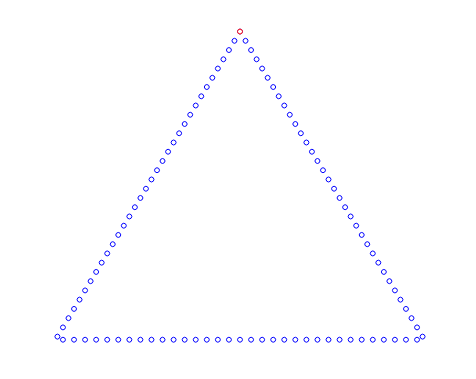
Triangle
Lorem ipsum dolor sit amet, consectetur adipiscing elit. Ut elit tellus, luctus nec ullamcorper mattis, pulvinar dapibus leo.
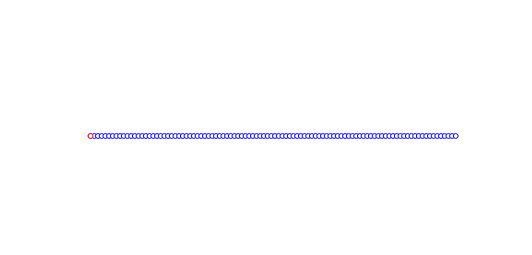
Line
Lorem ipsum dolor sit amet, consectetur adipiscing elit. Ut elit tellus, luctus nec ullamcorper mattis, pulvinar dapibus leo.
Point List
Lorem ipsum dolor sit amet, consectetur adipiscing elit. Ut elit tellus, luctus nec ullamcorper mattis, pulvinar dapibus leo.
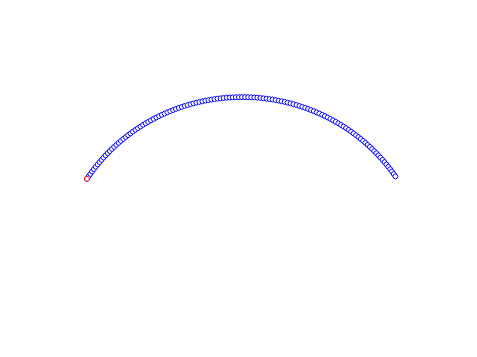
Arc
Lorem ipsum dolor sit amet, consectetur adipiscing elit. Ut elit tellus, luctus nec ullamcorper mattis, pulvinar dapibus leo.
Known issue: Shape preview scaleThere is an issue with the current display of the shape preview because of the fixed scale used. Creating too large geometries will result in the preview being drawn off-screen and thus appearing blank. We are working to resolve this issue asap!
Sampling Strategies
Once the geometry of your stimulus is selected, it is time to set the desired sampling strategy. Use the dropdown menu on the bottom right to set a type of sampling strategy, then adjust the strategy parameters using the textboxes. Again, remember to validate any input values by hitting enter. Below is a detailed description of each of the available sampling strategies.
Step Sampling
Lorem ipsum dolor sit amet, consectetur adipiscing elit. Ut elit tellus, luctus nec ullamcorper mattis, pulvinar dapibus leo.
Random Sampling
Lorem ipsum dolor sit amet, consectetur adipiscing elit. Ut elit tellus, luctus nec ullamcorper mattis, pulvinar dapibus leo.
Custom Sampling
Lorem ipsum dolor sit amet, consectetur adipiscing elit. Ut elit tellus, luctus nec ullamcorper mattis, pulvinar dapibus leo.
Custom Timestep Sampling
Lorem ipsum dolor sit amet, consectetur adipiscing elit. Ut elit tellus, luctus nec ullamcorper mattis, pulvinar dapibus leo.
Stimulus physical parameters, simulation and display preview
The Stimulus Designer provides a set of preview and diagnostics information allowing you to gain a better understanding of the physical parameters and behavior of a configured stimulus. Below is a detailed description of how to interpret and use them.
Stimulus Playback
The first and most obvious way of gaining a better understanding of the behavior of a configured stimulus is simply to emit it. Ensure your Ultraleap haptic interface is connected, switched on and the Ultrahaptics service is running.
You can then use the “Start Emitting” and “Stop Emitting” buttons on the UI to trigger and stop sensation playback.
Changing any configuration parameter (geometry, geometry parameter, sampling strategy, sampling strategy parameter, or device sampling rate) will automatically stop any stimulus emission, requiring you to re-click “Start Emitting”
You can customize the device hardware sample rate to fit the characteristics of your device (or to investigate effects of downsampling) using the input field on the bottom of the UI.
Gain parameterThe "Gain" parameter under the hardware sample rate is currently unused. In the future, it will serve the purpose of proportionally limiting or boosting the peak pressure of the focal point (over the entire stimulus) either as a convenience function to be used in parallel with the amplitude modulation overlay, or as a means to amplitude-match stimuli between devices with different transducer characteristics.
Stimulus Physical Parameters
As soon as any change is made to the sampling strategy parameters, the Stimulus Designer will display a set of physical parameters of the designed stimulus on the bottom left of the UI.
Base Step: Smallest distance unit between two neighboring focal point positions on the stimulus path [mm]. This distance is calculated in a straight line between neighboring points. Keep in mind that in the Custom and Random sampling strategies, actual distances between neighboring focal points may be integer multiples of the base step.
Base Timestep: Time unit between two subsequent focal point positions [µs] (keep in mind that in the Custom Timestep and Random sampling strategies, these subsequent positions may in fact be the same position). Calculated as the inverse of the device hardware sample rate.
Base Speed: Mean focal point speed over the stimulus path [m/s]. This is calculated as (total path length) / (stimulus period)
Base Frequency: Draw frequency of the stimulus [Hz]. This is the inverse of the time it takes to complete one cycle of focal point movement across the stimulus path: 1 / (stimulus period)
Playback Behavior Preview
The Stimulus Designer also provides tools for graphically previewing the path followed by the focal point over time.
Pressure Distribution Simulation
Lorem ipsum dolor sit amet, consectetur adipiscing elit. Ut elit tellus, luctus nec ullamcorper mattis, pulvinar dapibus leo.